External memory keypad build for ICOM IC-705 and ARK-705
Opening Story
Since I started to be active on CW lately when doing portable operations, one thing has surfaced - when calling CQ on CW I like to key it manually using the paddle to strenghten my muscle memory. However, sometimes it takes some time for hunters to find me on the band, or when the activation is long-lasting and nobody is currently calling me, I am using this break to drink some water or have some snack.
But when I am eating, drinking, need to adjust my log, sitting position, antenna or whatever, there is a risk that somebody will take over my frequency, or the hunters do not know I am still there, because I am not currently calling the CQ. For such situations, I started to feel the urge to use the automatic memory keyer that is present in my portable workhorse ICOM IC-705.
When I am activating some outdoor reference, being it WWFF or POTA or other, I am using the battery-saving mode of IC-705, which means that the radio display is switched off completely. In order to use the memory keyer, since there is no dedicated button on radio front panel, I need to switch on the display, navigate to menu, select keyer option and then select the memory I want. So many button clicks!
Is There An Existing Thing?
I know that the external memory keyer keyboards exists for such purposes, so I took a look at the offerings. It usually looks like this. This is example keypad that WIMO sells:

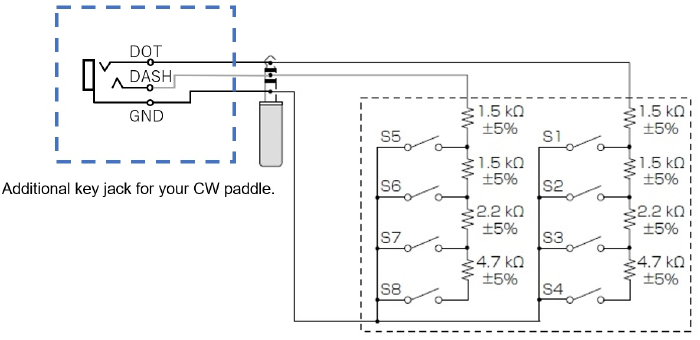
Bulky, expensive and ugly external box with big buttons. I imagined myself carrying one extra box in my backpack, that needs to be connected using a cable each time I am setting up my station and I immediately said no. I looked at the schematic of such external memory keyboard and it is just some buttons and resistors, so no big deal to build, so I thought about building a custom solution.
The Build
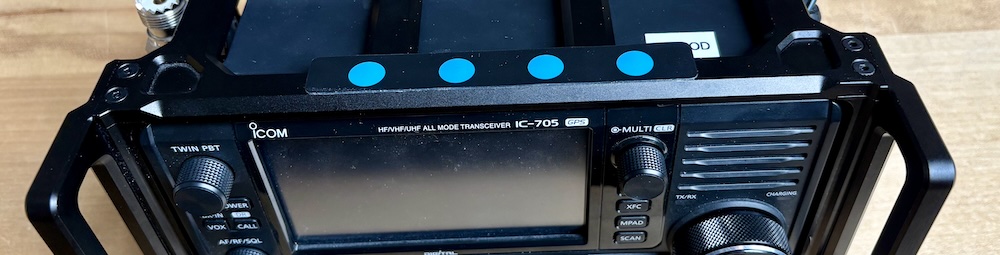
I have my radio placed in Windcamp ARK-705 protective aluminium protective shield/cage, I started to think about how could I possibly somehow integrate the keyer into that cage in the same manner I have the “integrated” powerbank, that serves as a radio power supply. Soon enough the idea has appeared!
I was thinking about using the low-profile membrane keypad instead of big ugly buttons so I ordered one, that looked good and usable on the pictures. The seller did not include the keyboard dimensions, so I hoped it will somehow fit into the place on the top of the cage which I thought could be a good, easy to reach, place. Once the keypad arrived, I found out it is a little bit wider than it could be, so there is a little overlap and little part of the keypad is floating in the air, but it has no effect on buttons functionality, just does not look as pretty as it could. So I went ahead and started to build.

I folded the cable multiple times in order to get it to the place, where the respective connector is placed, as hidden as possible. The flat cable is kind of “springy”, so I needed to use the hot gun to soften the plastic cable to be able to have the folds as thin as possible. Even then, the first fold that is right under the right-most button was causing the button to stick out and that was ugly. So I resorted to remove part of the aluminium under the button, so it does not stick out. This is of course irreversible damage to the cage, but it will be covered by the keyboard, so I did not care to do this.
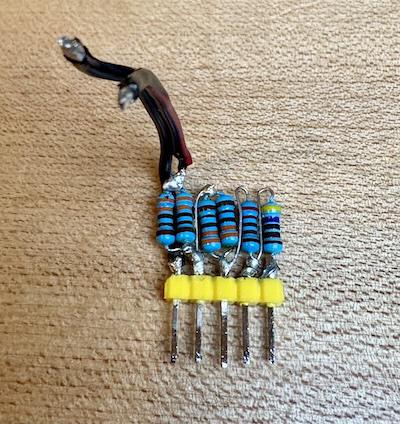
I used double sided tape to attach the cable to the cage on various places so it does not stick out somewhere. The cable lenght is so neat, that it ends up exactly where I needed. Next thing was to build the “resistor battery”, that will be connected to the keyboard connector. I did not have resistor with value of 1k5, so I needed to use pair of parallel 3k3 resistors instead. It worked, but it was taking more space, however, it turned out to be no problem.
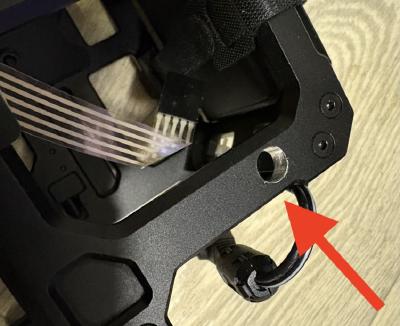
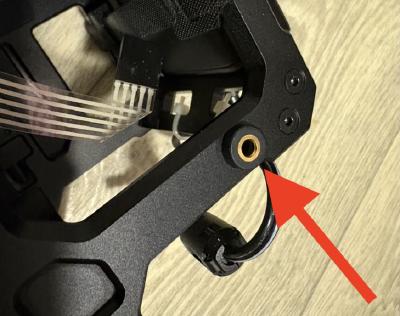
Next, I needed to prepare hole for CW key connector as using the external keyboard means that it will occupy the existing connector for CW key. I decided to put the connector to the top of the cage too. I drilled the hole and put a 3,5mm jack connector in it.
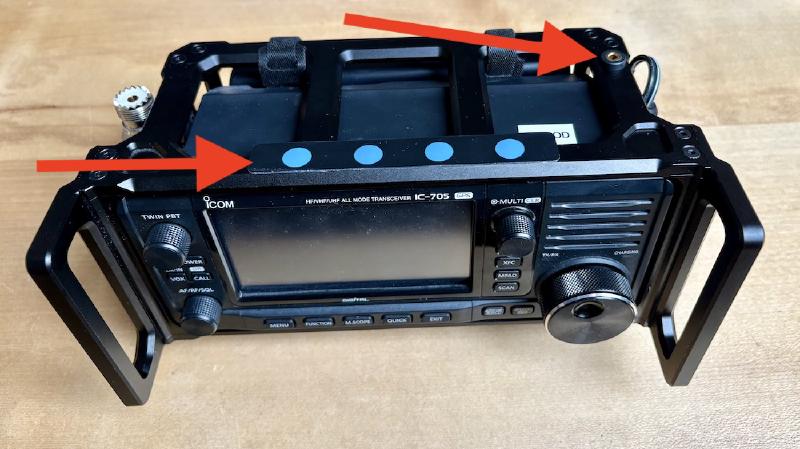
The Result
Last step was to wire it all together. Because I wanted it to look nice, I used the shrink tubing where applicable. This is the final result. There is also a demo video, but only in Czech language, but there is no extra info apart from what I have written so far.
Remarks
It has only 4 buttons, event there are 8 memories in IC-705, but those are sufficient for mmy needs. I managed to build a thing that works, and is part of the one whole compact piece of radio that I can carry. There is no extra box I need to have to take with me and connect each time I operate, which is a big win.
I case you want to build another keyboard with big buttons, you can look here for inspiration of very nicely made keyboards.