Restoration of 1942 Vibroplex Bug, Part 3
You can read previous parts:
Restoration of 1942 Vibroplex Bug, Part 1
Restoration of 1942 Vibroplex Bug, Part 2
Where we left off
Lets continue with the remaining items to be fixed from the list of faults, that was presented in part 2 of this article.
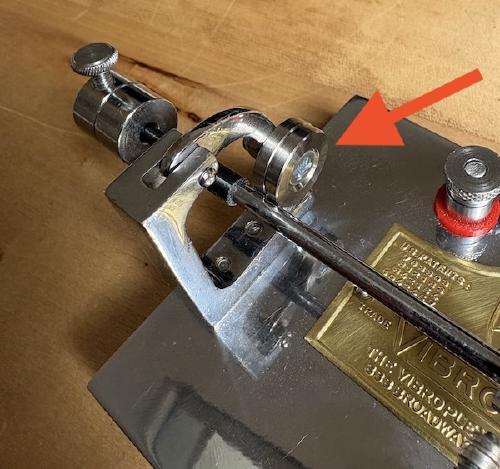
7 - Bent Screw For Setting The Dah Pressure
I am not quite sure what happened to this poor screw here, that holds the spring used to set the dah presure, but it was bent like hell.
What i did here is that I removed the screw from the main lever and using the vise and a pliers, I tried to make it straight, like it is supposed to be. I wrapper a piece of paper tape around so I do not damage the screw threads.

I was a little bit afraid that it will break but it fortunately survived my gentle handling.
The straightening process worked, as you will see on other photos of the key later.
8 - Unaligned Screw Holes In The Frame
This one is very interesting for me. I thought that the whole key is a precision mechanical device. I am not sure if this is just my key, or all of them exhibit similar characteristic, but the holes for screws on the frame on my key are totally unaligned.
Just one example of what I mean. According to my opinion, both trunnion screws are supposed to be centered, but this is how it looks on the upper trunion screw on my piece.
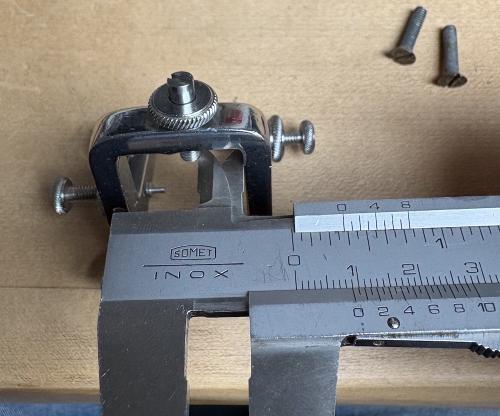

So it is off center by few milimeters. The bottom trunnion screw has the same problem and the top and bottom holes are not even in one vertical line - the bottom one is misaligned from the top one, which makes the main lever being slightly misaligned too.
There are few other places on the frame and more screw holes that are not centered and they should be. Most realistic explanation seems like the worker was maybe under influence of some chemical substance. The good thing is that it does not seem to have any effect on the key operation**, which is good. But this is definitely not a thing I would expect from a device like this.
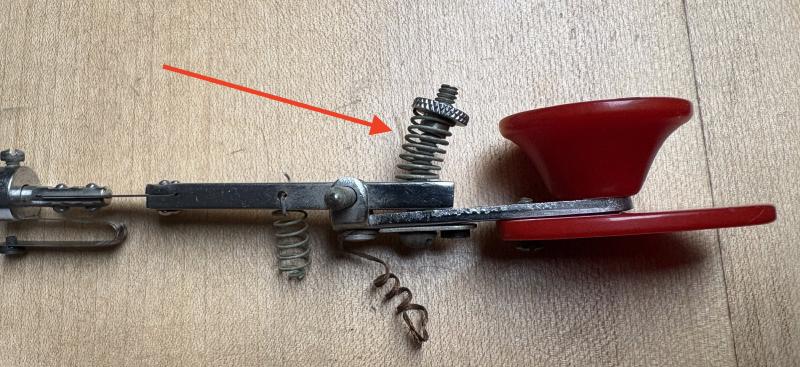
9 - Missing Screw In One Of The Speed-Setting Weights
There are two independent weights for setting the speed. However, one of them is missing the screw, which the sellet disclosed in the auction listing. Because I don’t intend to set any super speed in the beginning (I need to learn to operate this thing from scratch), I just glued the two weights together for now, so that one screw is enough for both weights :) Not sure if I will ever need to separate them, but the glue allows that, so in case I will get an spare screw someday, it will be no problem.
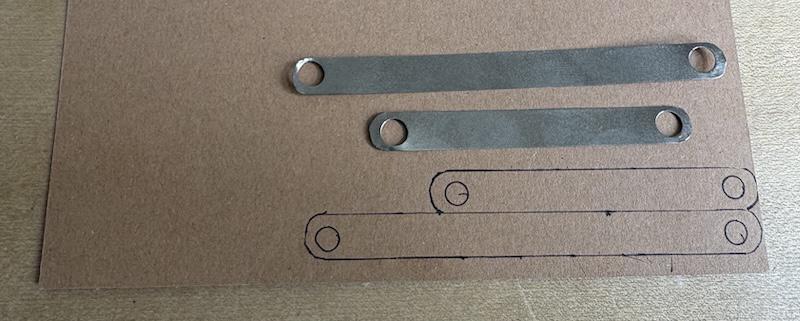
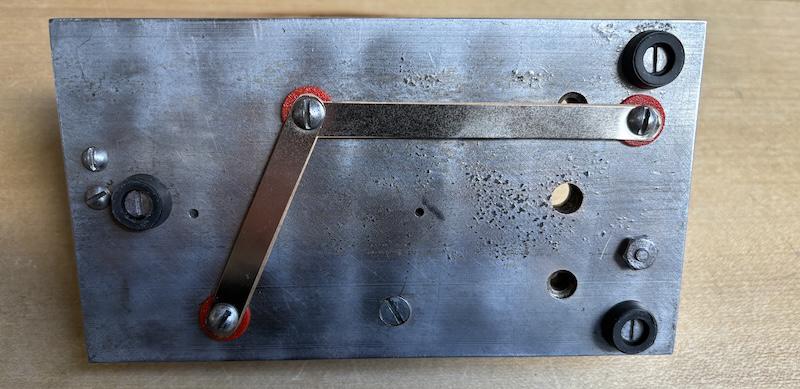
10 - Missing Bottom Connecting Metal Strips
On the botton of the base, there should be brass strips that connects the dit and dah switch contacts and those needs to be isolated from the base. My key had only one and the other one was missing. So I created a new ones using the nickeled metal strip used for welding battery packs and a piece of cardboard as an isolators, since that was what they originally used as an isolator, too.
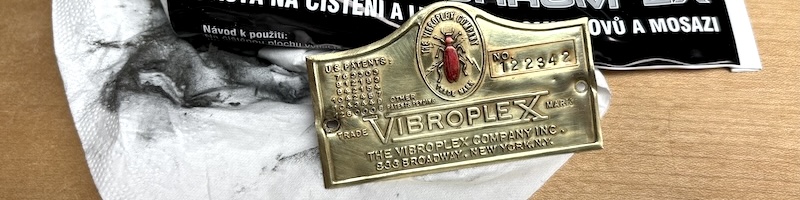
11 - Oxidized Name Plate
The brass name plate developed quite a patina over time, but it looked bad in contrast with the newly super-polished base. So I decided to polish it too. I have carefully removed the pins holding the name plate with the hammer and small-enouch center punch and then used a Silichrome paste, lots of q-tips and tissues and spent quite some time manually polishing the plate, which turned out pretty good.

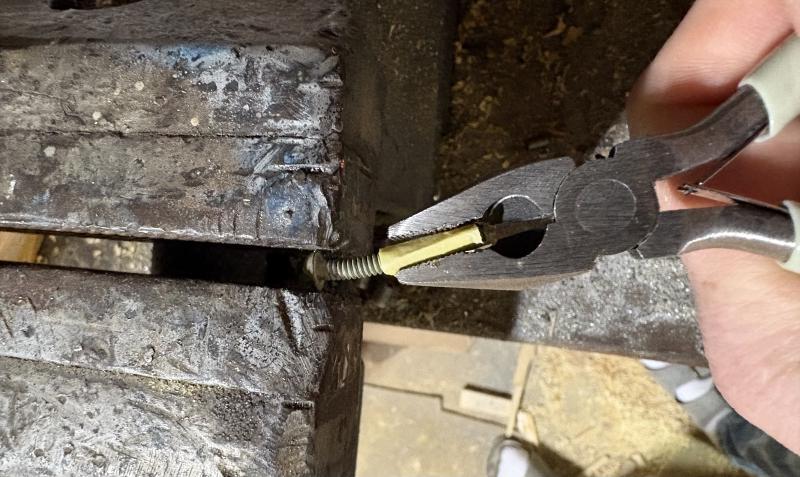
12 - Missing Damper Weight (Wheel)
One more missing thing, that I did not notice in the auction listing is that the wheel-shaped damper weight was completely missing. Its purpose is to stop the lever from oscillating when releasing the lever after sending dits. Again, buying replacement part was a nonsense due to postage, so I did a little thinking and I had an idea to find somebody with the lathe, so he could make me a replacement part.
Soon enough, I have scratched that idea, because I know exactly zero people and letting some workshop do it would most probably cost a nonsense. So I was trying to do a search for generic “15mm weight” and similar keywords. Side-note: the 15mm is my best guess on the dimension based on the marks that were left on the original part that is missing the weight and based on the images of buges I have found over the web.
During the search, I think that google images showed me something that looked exactly like the thing I was looking for, but it was basically a special type of machine washer. I believe the name is “countersunk concave washers” for metric screws.
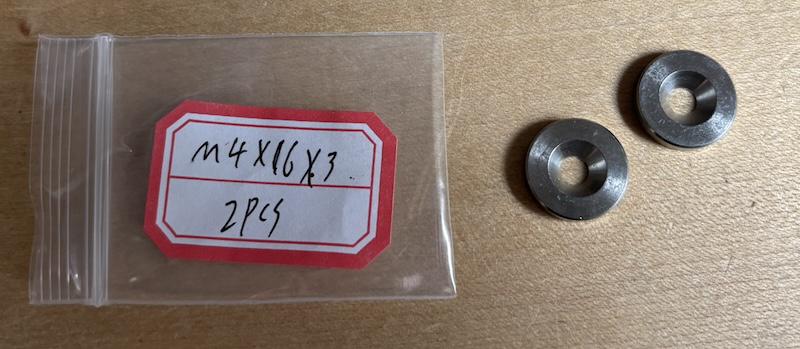
I have ordered multiple sizes from far east, because I could not find anything similar locally. When it arrived, I needed to have chosen the best size, which was 16x3mm for M4 machine screw size. Since the fixing screw was also missing and the thread was not metric, but imperial, I needed to cut a M4 thread using a tap, which was easy, as the metal was soft and resembled a copper.